
Custom Tootsie roll piggy banks made for 3 special little girls in my life.
Another tutorial! I made two of these before deciding I should really photograph the process while making the third. I think this is my own original idea... What they are is Tootsie roll cans (the kind with a money slot in the top) covered with fabric and ribbon. The bow toppers are mounted on clips and can be removed and worn! An adorable, fun, multipurpose gift! Yay!
What you will need to do this craft:
*Tootsie roll piggie bank can
*Coordinating fabrics and ribbons. I bought pre-cut fabric (also known as a 'fat quarter') and felt. You will need two sizes of ribbon - I used 7/8" ribbon and 3/8" ribbons.
*A hot glue gun and glue sticks
*Fabric scissors
*Blank hair clips (alligator or snap clips)
*A spool of thread
*a lighter (wait for it...)
*optional: fabric markers or fabric paint
I already had most of my supplies, but they are all available at your local Super Wal-Mart or craft shop.
How I created my piggie banks:

Measure your fabric against your blank can, mark (if necessary) and cut.
The fat quarters I got from Wal-Mart were a little thin, so I did an extra layer of felt under the fabric so that none of the colors or wording on the can would show through. It also makes it soft and cushiony, which I like. I would highly recommend using felt under any thin cotton fabric. Flannel seems to be great by itself (see green can above).

Add a seam of hot glue to the can and adhere one edge of your bottom fabric. Add hot glue to the can in a zig-zag pattern and roll the fabric tightly around the can until you reach the end. Trim any excess.

Repeat the steps above for the layer of color/print fabric.
Remember to pull the fabric tight as you go for a smooth finish.
Don't worry if your top and bottom edges are not exact. Remember, you are going to be covering them with ribbon to make them look neat and even. It is important to make sure the "seam" is neat, though. Here is now you are going to do it...

When you get to the end of your fabric, make one long thin line of hot glue and secure.

Then fold the fabric over on itself and glue it down to hide away any frayed edges.
Now it's time for ribbon!

Start at your fabric seam and hot glue the ribbon to the top and bottom edges of the can exactly as you did with the fabrics. You can pre-cut your ribbon to size if you like, but I leave mine on the spool and cut at the end.

You can fold your ribbon to hide your edges like you did with the fabric; or you can just heat seal it with a lighter, like I did. I also like to go around the top and bottom edges of the can with my lighter to check any fabric strings or hot glue blebs that are left.
On to the lid!

Cut a small square of fabric (or in my case, two) and trace the outline of the lid on the back. Cut out your fabric. It is easiest to cut the slot out if you fold it in half first.
**Note: If you want to use felt backing like I did, make sure you hot glue it to your fabric before you cut.

Align your fabric over the coin slot and glue starting under the pull tab.
**Another note: You shouldn't have to worry too much about fraying; since you will use hot glue near the coin slot and edges. But; if you want to be really sure, you can paint the edges with clear nail polish.
Optional Step: You can personalize your piggie bank by adding the child's name to it. There are many ways to do it. For my piggie banks; I used Stained by Sharpie fabric markers.
Bow-making 101!!!
Actually, there are some really great video tuorials at http://www.youtube.com/user/mommycraftsalot, but you can check my picture tutorial out, too (you're already here, right?).
First, you're going to make a two-loop "twister" topper bow. For the bow in my pic-torial (like that word?), I used 7/8" grosgrain ribbon, but the possibilities are endless. Be creative!!

Give yourself approximately a 3" tail at the end of your ribbon and make a loop with the printed side up. It will look like a cause ribbon at this point.
**Note: You can create your bow on the spool (allows more room for tweaking size) or you can cut 12-14" inches of ribbon to work with off the spool. Cut ends at an angle and heat seal.


Next, you are going to fold ('scrunch') your bow in the middle to give it a classic bow shape.

Then you will take your spool of thread and wrap several loops of thread
tightly around your bow and tie to secure.

Here is what your finished topper bow should look like.
If you haven't already, don't forget to heat seal your ends!
Next, you are going to make your surround-a-bow!

I'm not really great with exact measurements, so I just eyeballed it and made myself a cute little pretzel that looked like it would peep out from behind my topper bow (hey, whatever works, right?). After I got the size I wanted, I cut the ribbon and then cut a second section the same length. If you are a numbers person though, they looked about 12" long.
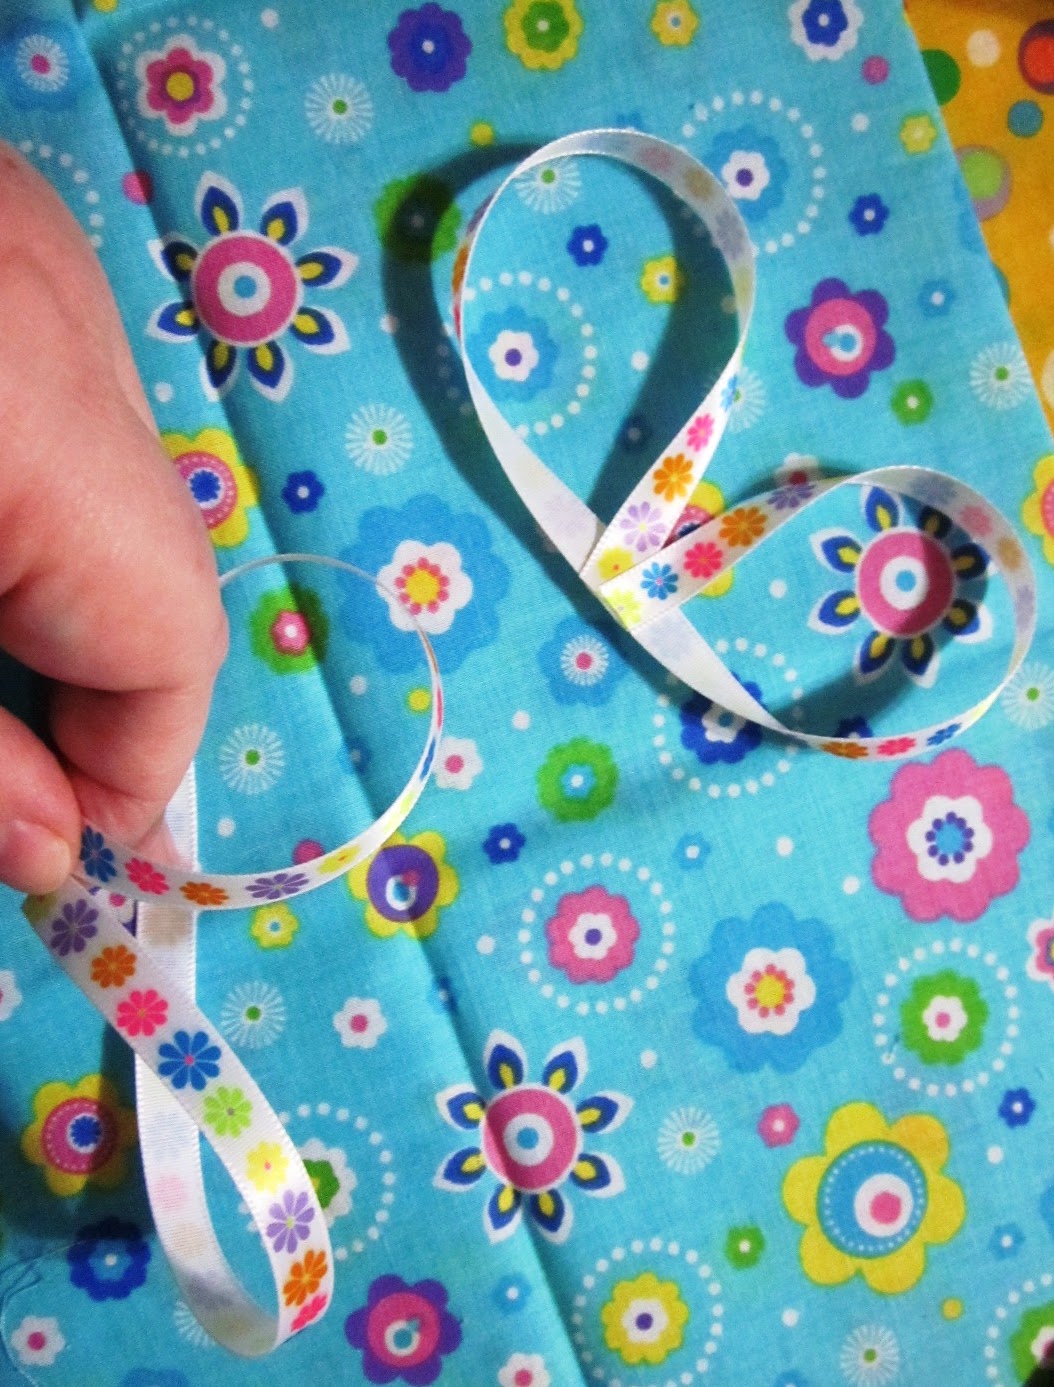
So again, you make a cute little pretzel shape (printed side up) and hot glue
the ends in the middle. You will do this with both pieces of ribbon.
*Note: If you're not sure what the middle really is, it works well to hold the ends of your ribbon and slide your index finger down the middle until it stops in the loop at the bottom. No sweat! Right?

Once you've made the two sides of the bow, you will hot glue them together
in the middle. No need to heat seal the ends on this one!

Then, you just place your twister bow on top and secure.
You can put a small amount of hot glue between your bows; if you like, but you will also secure them together by wrapping thread around them as you did with your topper bow. You will want to secure the finished bow to your clip at this point. I used a medium sized snap clip (not pictured) and secured my bow with hot glue and thread.
Now what to do with the middle of the bow?

I hot glued a large rhinestone onto my bow. You could also hot glue a short piece of matching ribbon around the middle. It would also be cute to use buttons, a ribbon flower or a small applique! You can use anything you like as long as you cover your thread.

Then you just attach your bow to the coin slot at the top of your
piggie bank and you're good to go!
HOORAY!!!
Your Tootsie bank is finished!!!
OMG! These are so, so cute! I couldn't see the pic well on FB on my phone b/c the caption was on top. I love them and the girls will as well.
ReplyDeleteIs this a Maggie original, then?? You done good, gal! YoMama
ReplyDeleteI hope they love them, Sara. :)
ReplyDeleteI hope it's an original, ma. I haven't looked to see if there is anything else like it out there, though.